Graded Unit Game For It!
Schedule
Scheduled
First Scheduled for graded Unit

Research
Mindmap

Mood Boards


Idea 01 rough sketches

Idea 02 (Smoke) Character Moodboard

Idea 02 (Smoke) Environment Moodboard

Idea 02 rough sketches

Idea 03 (Spirit) Character And Environment Moodboard

Idea 03 rough sketches

Idea 04 (7 Deadly Sins) Symbols and Character Moodboard

Idea 04 rough sketches

Idea 05 (Dreamer) Environment Moodboard

Idea 05 rough sketches
Mentor Meeting 01
03/03/14
First mentor meeting with class tutor mainly revolved around the project plan. I passed and got a B but had many mistakes and missing information within it, such as my books for research had no authors and one or two of them had the wrong title. My links for inspiration and image links were also referenced poorly and could be improved by adding in the relevant information normally used for referencing. My use of bullet points were helpful for myself but I over used them in the project plan and could have had a few more paragraphs of summary.
Updates
Production diary
Schedule Update
 I had to make some slight alters to my scheduled
Updates
Production diary
Week 1 24/02/14
I wrote Project proposal
for the Friday 28th but I was an hour late in handing it in and lost
marks for this.
I Brainstormed different
ideas for the Game For It! Project
Narrowed ideas down to 5
I assigned a page in
Sketchbook for each idea which consisted of a brief storyline, sketchy
character and environment ideas, possible props and rough thumbnails. I also
created 2 mind maps. One map about the brief; another on research for the ideas
which consisted of looking at other games with their storylines and different
aesthetics.
I also wrote a 450 word
pitch which consisted of my 5 chosen ideas which I submitted on Monday.
Schedule Update
Chosen Idea Moodboards
Dreamer

Looking at masks for Female Character

Looking at basic low Poly designed characters

Looking at different possibles areas of creating style for the character with the intention of the character being a shadow with few if any colored designs

Demon Character moodboard looking at color and basic design

Looking at different Spiritual and Ritual Masks for demon characters

Narrowing down Demon character design, I think having them move almost like puppets would have a good stylistic effect. The hand drawing images in this moodboard are by me and are from my own personal drawings before I started the project.

Looking at Interior Environments

More abstract Interior Environments along with a few pictures of my own primary research.

Looking at Exterior Environments

Looking at more Surreal Dream Exterior Environmnts

Dream/Surreal Environments

Looking at less busy environment Styles with colored lighting and some other stylised looks

Looking at games with layered backgrounds and some with 3D characters

Looking at bight very colorful Environments

Looking into Minimalist designs

Stylistic silhouette characters and background for inspiration

Inspiration for Factory Exterior Environment

Looking at different types of typography
Production Diary
Week 2 03/03/14
Decided on my
final idea.
I then carried
out further research using mood boards. In these moodboards I looked at
environment in more depth, deciding on exactly what I may put in my final game
trailer. I looked in more depth into character design, such as types of masks
for the character plus simple character designs along with low poly character
designs. I also created mood boards for my demon characters with one consisting
of both primary and secondary research with my own personal drawings as the
primary research I also created
a few mood boards on colour and looked at minimalism for both character and environment
aesthetics. I have also briefly looked at different dream environments and different
surrealism environments.
Scheduled Update

Sketchbook
Chosen Idea: Dreamer

Rough Thumbnails


Character Design


Looking at colour and patterns in Aurora's Dress


Looking at the three main poses for my character
Production Diary
Scheduled Update
 A few more alterations were made
Character Pose Sheet
Production Diary
Week 3 10/03/14
I have my final character designed
but do not have the model sheet completed yet.
For environment, I have
initial sketches but have not decided on all of my final environment designs.
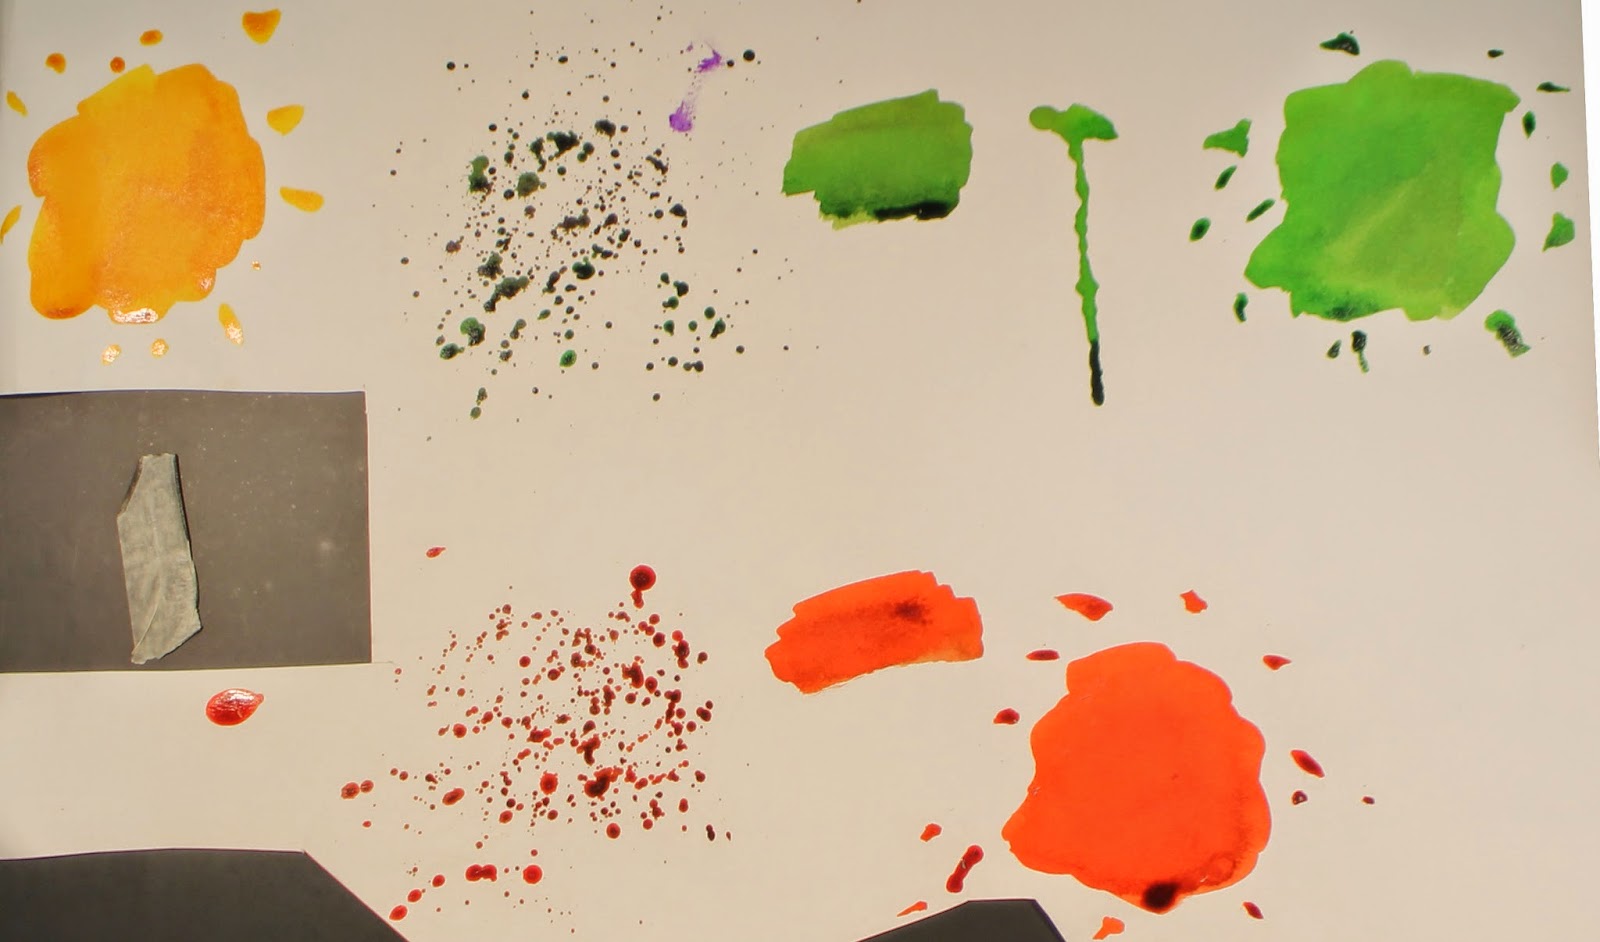
I experimented with colours
using different media for both character and environment design. I also created
2 sets of thumbnails but plan to do more. I still have to work out the timing
but I have a rough idea of what the story within the trailer will be.
I also created a few more
mood boards for the exterior environment of a factory looking at steampunk
imagery such as gears and clock insides.
Created another mood board
looking at style and simplicity of environment for both interior and exterior
sets.
Have decided that my
interior environment will be a long hallway but have not finalised its design.
Scheduled Update

Demons

Looking at demon face and head designs.

Looking at demon body designs.

Looking at different mask designs for the demons.
Final Demon designs

Demon 01

Demon 02

Demon 03
Environment
Environment

Cloud and moon designes
Internal and external building designes


Environment Designe


Looking at logo ideas
Typography for ending game title


Final Designe

Final Thumbnails

Storyboards
Storyboards


More Detailed Story Boards


Mentor Meeting 02
17/03/14
In the second mentor meeting, the workload was building up but not as much was being done as it should have been and I was beginning to fall behind. I was asked by the Tutor to create a list of what was required to be done to be able to meet the animatic deadline coming up for the 21st of March (this Friday) The list was
- Finish Character Pose Sheet
- Create a Character Model Sheet
- Create Storyboards
- Have Final Environment Decided
Animatic
I realised that my Animatic revealed a problem with my storyboards, which was that it was way too fast to read for the frames with writing so i will have to think of something to solve this problem. At the moment I think I might either cut out a scene or two, or maybe integrate narration or put the frames with writing into less frames and combine them.
Production Diary
Week 4 17/03/14
I finished my Story boards
and Animatic with sound and submitted it on Friday 22nd. Have finished
sketchbook stage apart from final environment drawings, but have not put all
drawings and sketches including thumbnails, colour experiments, and some
initial sketches and designs into sketchbook yet. Have final environment designs
but have not created final environment drawings yet. I am behind on my schedule
for modelling my character and environment. I intend to spend more hours on
modelling next week to catch up on this. I am planning to have all of my sketch
book completed by the end of next week also.
Scheduled Update
 I edited the scheduled again slightly as i was falling further being my other schedules again
Scheduled Update
3Ds Max
Modeling
 | ||
| Using Model sheets imported int Max to model my character |
Modeling the mask


Neck Problems

Problems
I actually modeled my character twice. The first time I modeled it I added the turbo smooth modifier, and it ended up being just under 30,000 polys, which was way too many and I realized if I kept it with that many, weight-mapping and rendering would take a lot longer and I would be risking losing more time than I actually have to spare. Other than that with modelling I didn't have many problems. There was a problem with the mask and I had to delete half of it, then mirror and weld it so that both sides would be symmetrical. In the end it wasn't such a big problem and didn't take long to fix. The bend modifier on my mask was quite difficult to figure out and took some time to get right.
Basic Texture for Mask

Basic Texture Character


Problems
I struggled to find the best looking silhouette texture for my character, i remember my tutor saying tht no sillouet is pure black, but i cant find one that looks right and i think i might have to just keep the character silhouette as being pure black.
Un-Wrapping the mask


Problems
This took me alot longer than what i had planed and i ended up messing up the first one by welding some of the back vertexes to the front, messing up the texture design, and i didn't save the 3ds Max file for it, and so had no choice but to start it again.
Production Diary
Week 5 24/03/14
I have modelled and
unwrapped my character but only partly textured her so far so will end up around
a day behind on my schedule. I am behind on my environment as I have only produced
two of my designed environments so far when i was hoping to have them all completed
this week. I have been very pedantic over the character texturing and have
spent more time texturing her than I should have. This has resulted in me
having less time to work on other areas like environment design. I plan to
finish texturing next week but will be less fussy about it and leave time for
other things.
Scheduled Update
Scheduled Update
No alterations have been made
Texturing the Mask 


Problems
I wasted too much time on texturing the mask. I spent a day and a half texturing the mask, making it a lot more complicated than what it needed to be. I kept changing the texture so that it would fit with the unwrapped mask. I kept editing it for the slightest thing that didn't look right, when it would have been fine the first time I did it. I don't believe my mask texture now even looks like it's worth a days work.
Heart Texture with Opacity Map


Problems
Not really any problems with this texture or the animation of this texture. The first way I was going to animate the heart texture was in After Effects, by creating a few and looping them. It had the possibility of being quite time consuming, but a tutor showed me a much quicker way also in After Effects, which was just scaling the heart and setting key frames.
 My re-do of the tutors animated heart, i re did the animation of the heart, just so i'm not just copying and pasting his work and am also learning by doing, it for myself.
Production Diary
Week 6 31/03/14
I completed my character
texturing and all of my environment designs and put them in 3ds max. I have still
to texture them and I need to create transparency maps for some but am having some
problems with getting it to work. At the moment the parts of the image I wish
to be transparent are still showing up.
Rigging my character is
becoming more of a challenge, and taking a lot longer than I thought, I won’t
be able to have it finished by this week.
I have modelled most of the
platforms for each scene that my character will be running on. I have also modelled
the key and speed orb props for the dream environment. I have also created the
cameras but still need to do the lighting.
Schedule Update
Schedule Update
I had to updated my scheduled again, i forgot to do it last week
Rigging


Problems
Rigging took a week to finish which was a lot longer than expected, pushing me further behind schedule, and I was forced to push dates forward. I couldn't get the bones to link properly to each other and they kept breaking, and it was taking me about a day to successfully like the bones in a single apendige so one day for the feet another for the leg. I struggled most with the spine, since my character didn't have the usual amount of spinal bones. My character had one where as most models tend to have a bit more.
Graph Editor


I came across the Graph Editor by chance, after I was able to figure it out, which wasn't too hard, rigging became a lot easier.
Weight-Mapping


Quick Weight-Mapped Cycle
Problems
With Weight-Mapping I didn't really have many problems. All i needed to do was figure out where some vertices were weight-mapped and if they should be weight-mapped there. Luckily compared to rigging, weight-mapping only took me a day and though it's not weight-mapped to a high standard I decided I didn't have enough time to try and weight-map it any more, and through the cameras the bad areas of the weight-mapping aren't too visible and hopefully wont be too much of a problem or an obvious failure later on.
Mentor Meeting 03
21/04/2014
For the last Mentor Meeting the amount of time going into the blog was discussed. I should maybe be spending more time on finishing the animation than working to keep the blog up to usual standards. The first Dream Environment may also cause possible problems involving the character, with it having the potential to outshine the character and take away the attraction for the character. Another thing discussed was to try to free up a few days at the end of the project due date, just in case there are any unsuspected problems that arise.
Development of Demon panels


Environment
Drawing the dream Environment (Exterior)


Trees were drawn to match the end at both sides so i could loop them together

Drawing the dream Environment (Interior)

Hallways for dream interior environment were drawn so i could loop them.
Drawing the dream Environment (Exterior)


Moons For Dream Environment


Drawing the reality Environment (Interior)


Hallways for reality interior environment were drawn so i could loop them.
Drawing the reality Environment (Exterior)


Building the environment in 3ds Max


Creating the opacity maps


Faulty Opasity map


Some of the finished opacity maps for environments


Renders of different sky textures


Environment Opacity Maps

Environment Textures


Production Diary
Week 8 14/04/14
I have started animating my
character and have created my walk cycle. The preview render looked sufficient.
I am not sure why but half of my blog turned into Russian when I was trying to
update it. This happened at the end of the week so I was unable to get tutor
support over the weekend. I emailed my tutor about this and he replied to say
that he would check it on Monday when he gets a chance to look at it. I have
stopped updating my blog for now as I cannot understand what is being written.
Scheduled Update
 From the opinion of my tutor i alterd my scheduled again, to give myself a week to animate
Scheduled Update
Animating
Walk Cycle
Walk Cycle

I was struggling with animating, so used a really usefull website given to us at the start of the year which helps with how to create a walk cycle.

I put up a light blue plane so that i could see the movements of my character better

I wanted to have my character running rather than walking so I looked up running walk cycles and found this image and used it as a reference, it was very useful for the legs but for the upper body not so much.
Website for walk cycle reference image: http://empaht.wordpress.com/2011/02/24/human-walk-cycle/

Looking at character walk cycle, using consistent colours, I think it looks quite stylistic and am thinking now I should of made my dream environments more simple.

After a discussion with my tutor i found out this image of the man running it commonly used among animators as a reference image, and is good material to work from.
Character walk (Run) cycle

This took me quite a while to get right, but i got the hang of it after remembering my last project "Stars Where I Come From" by Marley David.
Production Diary
Production Diary
Week 9 21/04/14
I finished animating. It
could be better so if I have time after editing my animation I might go back
and change it. I am a week ahead of schedule as I got deadlines dates and week
numbers mixed up. This is lucky as I did not plan on having an extra week so I
can now try to fix things and improve my project. I plan to fix some areas of
the animation later on if I have time. There is one scene I would like to redo
and render it out if I have the time.
I translated my blog back
from Russian to English. It turns out that I had switched on the translate
button by accident when I had meant I hit the spellcheck button. I animated all
of my cameras and did my lighting.
Scheduled Update
 I finished a few things before i planed and added in a few extra thing at the end of week ten in purple, so altered my scheduled again
Scheduled Update

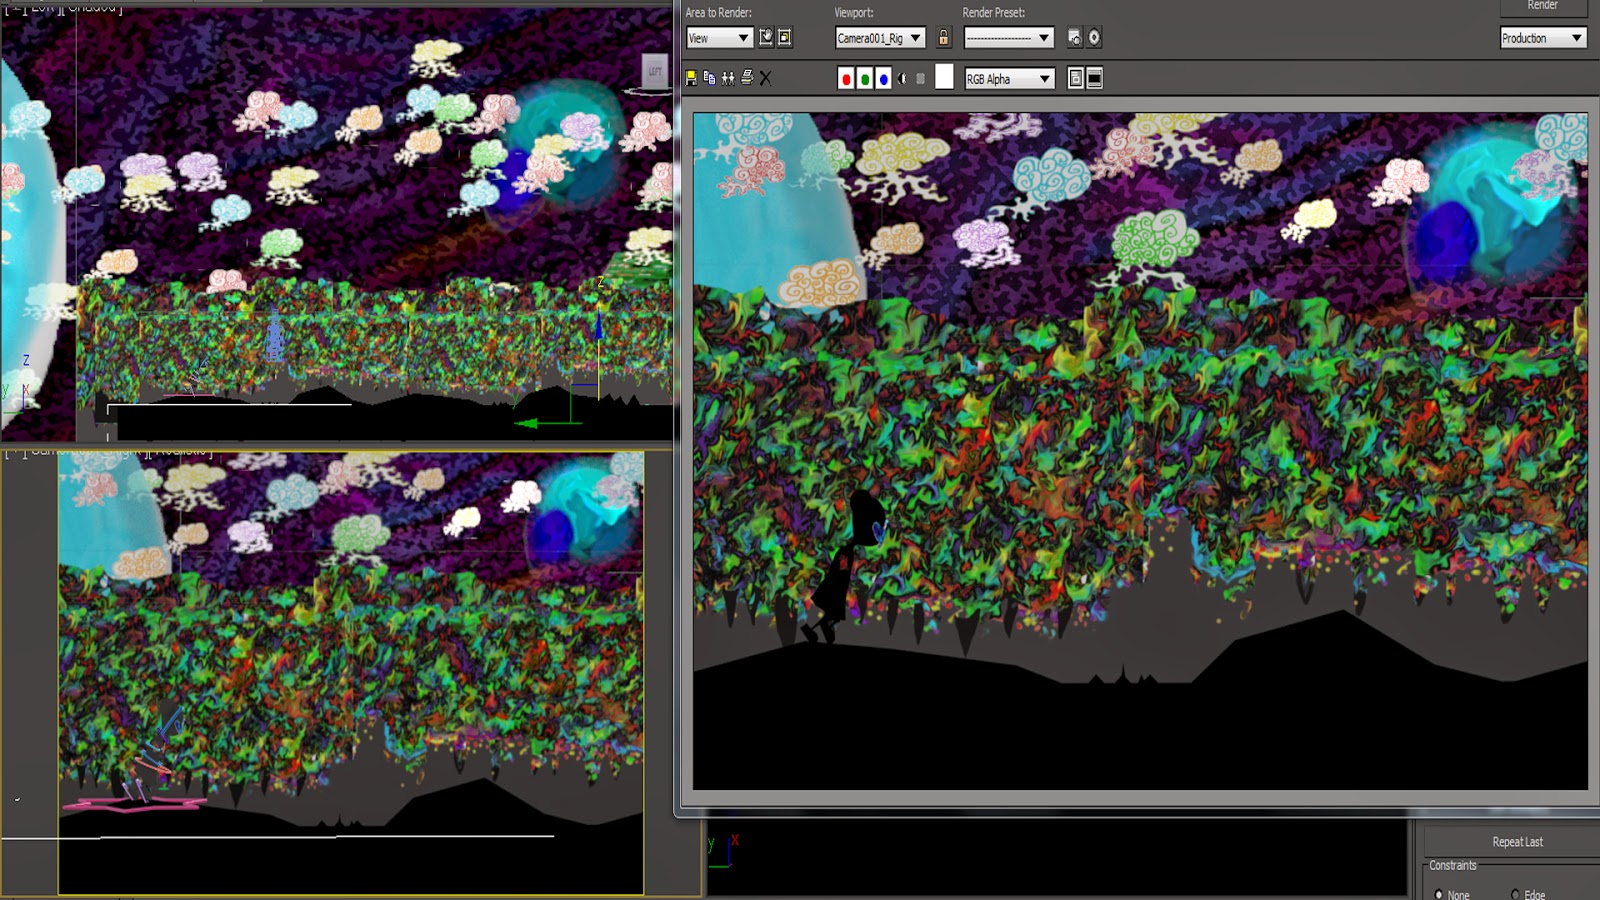
Checking the camera size and position is right using a render of the image. At the top there is a black strip which means the camera is too far away and needs to be brought in closer.
Some Preview Renders of the first Dream Scene

A quick render of my rough character animation.

I rendered it again after alterations, and added in a camera which moves too fast for the character and the character gose out of the frame for a bit. So i will need to adjust the speed or animate more than one for the right and forward movements.
Problems
I realised after watching these that their was something wrong becuase the platform was cut off, and i found out it was my ratio, i had it at the preset of 3DS Max but it needed to be eather, 1050x567 or 1024x576. So it was useful that i did those renders before i had actualy renderd the whole scene out, becuase of this if i have time i planed on doing preview renders of every other scene i have, just so i don't wast time rending out images that are wrong, in any way.

A new screen shot of adjusted camera settings
Before and After :/
Problem
Problem
I'm not sure why this happened but i wasn't able to re-link them all to follow the character again, so i had no choice but to open up a later file, luckily i had a file that was working, and had most of the animation and just needed a bit of tweaking, so i was lucky this time with my file management and didn't have to much work to re-do.
Before and After :/
Problem
 |
| This is a screen shot of a render of my character, hear it looks okay |
 | |
| This is another screen shot of a render of my character a few frames later, here their is an obvious problem, i don't know why but the hair, mask, eyes and the heart all stayed behind as the animated character carryed on forward. |
Problem
I'm not sure why this happened but i wasn't able to re-link them all to follow the character again, so i had no choice but to open up a later file, luckily i had a file that was working, and had most of the animation and just needed a bit of tweaking, so i was lucky this time with my file management and didn't have to much work to re-do.

Beating Heart Into 3DS Max

Rendering Layers

This is one of the renders put into photoshop so that the platform and character aren't consumed by the darkness of 3DS Max
Problem
A problem occur the first time a layer on it's own was render that someone in the second year in my course pointed out.Since the trees were suppose to be another layer i didn't render them with the platform and character, but due to the way i built my platform layer i will now have to render out the trees along with the character and the platform, so that the platform in the distant still looks like it is being the trees not in front.
Pre-Renders

Dream Scene 001
Camera 001
A Pre-render with the controlers still visible on the model, i forgot to hid them :/
Also the moon on the left is missing and i didn't realise i had hid it and forgot to un hide it for this pre-render.

Dream Scene 001
Camera 002
Moon Problem

With my moon problem i realised that in one of my scenes after one of the pre renders i needed to alter the distanse the three moons are animated to, so the pre-render were again usefull becuae they quickly renderd and showed me something i needed to fix. It wasn't that big a problem though and i just alterd the last keay frame and animated it to stop befor it got in the cameras way.
If time put in other scene pre-renders
If time put in other scene pre-renders

Animating using the New schematic view


Problem
I am still not sure why but for some reason when i was animating my two dream scenes all my controllers apart from the right foot one dissapeared, but in the Schematic View the were still their as well as in the layers, they just weren't visible. I was aware that in the Schematic View you were able to see a lot, from the character mesh, the bones as well as the environment and the character controllers. I ended up using this to animate with, but i only used it as i saw it as my last resort. It was time consuming and tricky but not as difficult as it could of been if i hadn't labeled my controllers, but luckily i did. This wasn't a massive problem but it did affect my character animating, and i feel the quality was also lost. I had finished both my reality scene environments and so they were not affected, and for the first dream scene they seemed to return for a while after i had finished animating.
Rendering With Layers


After Effects
Colour Correction


Opasity


Colour correction


More Colour Correction


I tryed to see what changing the colour of the hut would look like but i decided to go with the original one though i feel it blended in with the mountains


Pre- renders


Faulty Pre-render

Final Alters

Production Diary
Week 10 25/04/14
I have rendered out my hole
animation and I have finished nearly everything with after effects and now just
need to alter some of the layers such as the position of the moons so they look
more like what I was going for in my storyboards. I think I might also alter
some of the colours in my first dream scene and if possible I would also like
to add a glow effect to the trees and my character for the character collects
the speed ball. I have also created all the credits in premier and I am
planning on using the same music that I did for my animatic, so all I need to
do after rendering everything from after effects is stitch each scene together
and A-line the music to each section appropriately.

Scheduled Update

I exported this thinking it was my final animation but i realized i forgot to credit one of the sources i got my sound so i had to add it in and the export it again
Final Animation
I re-rendered my animation after i realized i forgot to credit one of the places i got the sound from
Production Diary
Week 11 05/05/14
I finished and rendered out
of after effects ahead of schedule and put it all into premier. I was also able
to re-render the sections of the animation again. Due to me having so much time
left I decided to animate the character for the end credits sequence. After I imported
the render I just put it straight into premier and altered the speed to blend
in more when the credits appear. I also altered the speed of the two dream
sequences to slow them down a bit because I felt it was too rushed. When importing
my chosen logo because it lost its transparency the white cloud was lost and
just an outline was left, I fixed it quickly by basically placing a light blue
solid behind the title during the time it there was only a black background
behind it so It appeared more visible. I exported everything from premier and
submitted it onto my blog and have now finished my whole project and just need
to do my evaluation report for it next week.
Alters
In my final animation i changed the speed of the text because i felt that it was to fast and after getting the opinion of a few other people i realized it was a bit to fast to read.
I did not get my character to glow because i made her pure black and the glow effect in after effects dose not affect pure black so i was only able to make the trees glow.
I added in different numbers by key framing and made it look as if it had a time limit.
I took out some of the scenes times with the character animation to fit in the extended text panels and because i think it would look to fast, and end up being to difficult to follow.
No comments:
Post a Comment